|
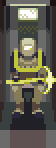
Miner
|
||||
| |||||
| ||||||||||||||||||||||||||
| ||||||||||||||||||||||||||
Abilities[]
Crush |
||
Cooldown: 0 seconds Crush nearby enemies for 140% damage. | ||
Drill Charge |
||
Cooldown: 8 seconds Charge up for 2 seconds. On release, dash through enemies for up to 600% damage. You cannot be hit while dashing. | ||
Backblast |
||
Cooldown: 5 seconds Blast backwards a small distance for 200% damage, stunning all enemies. You cannot be hit while dashing. | ||
To The Stars |
||
Cooldown: 5 seconds Jump into the air, hitting all enemies below for 3x180% damage total. | ||
StarboundJump into the air, hitting and stunning enemies below for 5x180% damage total. | ||
Tactics[]
- The Miner's primary attack, Crush, is one of the strongest, and most useful in the game. Unlike most other melee characters, such as Acrid and Mercenary, he isn't forced to budge forward while swinging, so he can sit on top of ledges and batter helpless foes on a slightly lower or higher platform.
- Additionally, Crush has a much longer range than its animation would imply. To get an idea of exactly how far it can reach, simply spend a few seconds battering a Lemurian in the first stage without moving and watch how the creature is pushed back before attacks cease to hit it.
- This range is increased to insane levels when combined with the Heaven Cracker.
- In fact, Crush (as its description would imply) can hit all nearby enemies, even ones slightly behind the Miner.
- This range is increased to insane levels when combined with the Heaven Cracker.
- Additionally, Crush has a much longer range than its animation would imply. To get an idea of exactly how far it can reach, simply spend a few seconds battering a Lemurian in the first stage without moving and watch how the creature is pushed back before attacks cease to hit it.
- The Miner is all about crowd control. His attacks work okay on single targets but are truly meant for huge crowds since they damage all foes in range equally. Because of this, the Miner excels at wiping out large groups of enemies, rather than dealing with them one-at-a-time.
- A typical combo with the Miner is using To The Stars on a considerably large crowd of enemies, landing right behind said crowd and using the Backblast to propel him right back into it. A quick, non-charged Drill Charge can be chained onto that for additional damage. This does equal damage to everything in the range of his attack.
- Acquiring items that inflict status debuffs on enemies is absolutely vital as the Miner, for his crowd control attacks will inflict all foes hit with them.
- Items that increase mobility, especially the Rusty Jetpack, will greatly increase his effectiveness. Rusty Jetpack can be combined with the ultimate ability to form an extremely effective double jump since it gives the same elevation as a modified jump.
- Using To The Stars mid-air lets him jump a second time. Use this to reach places otherwise hard or time-consuming to reach.
- Drill Charge's charge time is based on attack speed. However, the damage does not appear to scale with the increased charge speed. That calculation seems to be based on how long the button is held; consequently, it seems charging the skill becomes less effective the faster attack speed is.
- To The Stars is not a typical projectile. The shots produced do not detonate on mid-air; the shots only produce damage directly below the Miner on the ground. The distance between the shots also does not change no matter how high the Miner is.
- Technically, the Miner is the most mobile character in the entire game, taking heed of his ability set. For example, combining them with Gigantic Amethyst, it is possible to do a quadra-dash (non-charged Drill Charge, quickly turn back, Backblast, Gigantic Amethyst, Backblast followed by another Drill Charge). Also, stacking move speed items like Paul's Goat Hoof causes Miner to dash even further.
Trivia[]
- To The Stars is a reference to the anime Tengen Toppa Gurren Lagann.
- Starbound is another game published by Chucklefish.
- If a player has not yet unlocked the Miner and find themselves facing Direseeker, activating the Jar of Souls and waiting for its ghost to die counts as killing Direseeker and will unlock the the Miner.
- If the Miner dies while in the middle of charging up a Drill Charge, the bar will not disappear, instead of staying there while the dead body goes flying backward.
- As a side note, the Miner is wearing what appears to be a welding helmet. This could explain why all of his attacks are area of effect, as when wearing a helmet of that style your field of vision is reduced dramatically.
- Miner was the second character added to the game after Commando.
Achievements[]
| Survive the teleporter event without falling below 50% health. | Panic Mines | |
| Reach level 10 without getting hurt more than once. | Shattering Justice |